2013-09-05
The purpose of this page is to show you how you can access a DX cluster via the Internet. There are many software applications available, some are free some are not. I can only comment on the ones I use.
Secondly, the purpose of this guide is not to force you to read the whole
manual of the various software packages. ![]() Instead
you must invest 15 minutes reading this page if you read all of it. You may also
come back from time to time if you forget how to do...
Instead
you must invest 15 minutes reading this page if you read all of it. You may also
come back from time to time if you forget how to do...
Commands or stuff to enter into the computer are written like:
telnet oz5bbs.no-ip.org
That is Blue Text in Fixed Width Format. The commands have been tested so they should not contain any error as long as you enter exactly what is shown at the beginning of the line. All command lines are followed by pressing the ENTER key on your keyboard.
Command parameters in square brackets [] are optional, and sub commands in capital letters must be replaced with the requested information.
Keep in mind there will be no permanent damage to the computer etc. So if you are in doubt then give it a try.
My DX cluster is OZ5BBS-7. It can be found on the Internet on the following IP address oz5bbs.no-ip.org port 8000. There is probably a cluster closer to you that you may use. All you have to find out is what is the address to the DX cluster. Ask somebody in your ham neighbourhood or try to look for one here.
OZ5BBS-7 uses the DX Spider software. The User Manual for DX Spider can be found on http://www.dxspider.org/main/usermanual_en.html. It contains several pages of detailed documentation that you may find useful.
You can use DxRetriever, download it here. To simplify starting DxRetrieverfrom time to time make a shortcut on your PC desktop. Do this by right clicking on a free space on your Windows Desktop and select New then Shortcut.
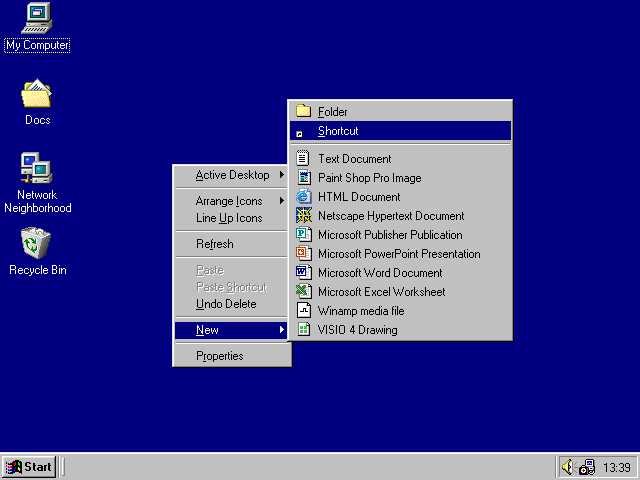
Enter the name of the program, in this case DxRetriever.
C:\Program Files\DxRetriever\DxRetriever.exe
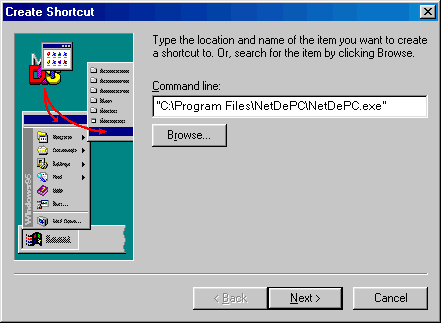
Press the Next button.
Enter the name you want the shortcut has on the desktop so it is easier for you to remember.
DX cluster
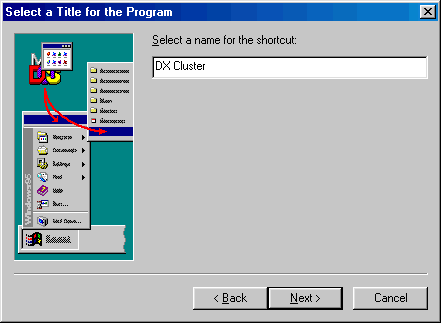
Press the Finish/Next button and you will see your shortcut on the Desktop.
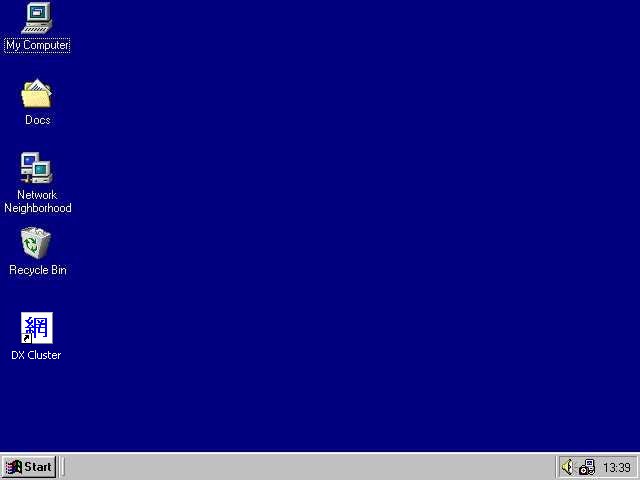
If you click on the icon shortcut that you created above DxRetriever will start.

Click the "Environ" button and you will see the picture below where you enter the DX cluster IP address details:
oz5bbs.no-ip.org
8000
OZ5BBS-7
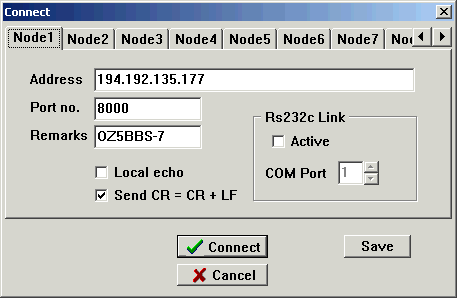
Then click Save and all the set-up is done ones and for all. Then click the Cancel button.
Click the Connect button, in the upper left corner, and then click the Connect button, on the tab sheet, and you will be connected to the DX cluster and you will be prompted for your login.
oz2m
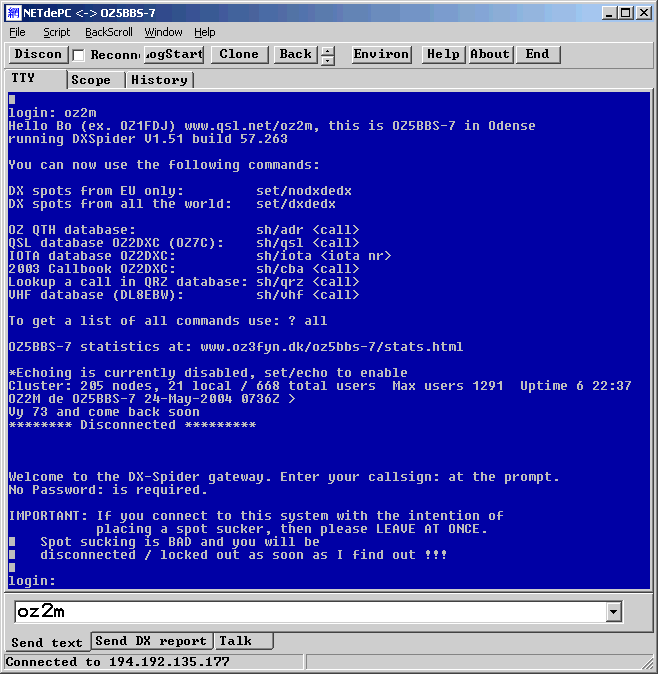
After entering your call you are now "inside" the DX cluster and can evoke command and queries etc.
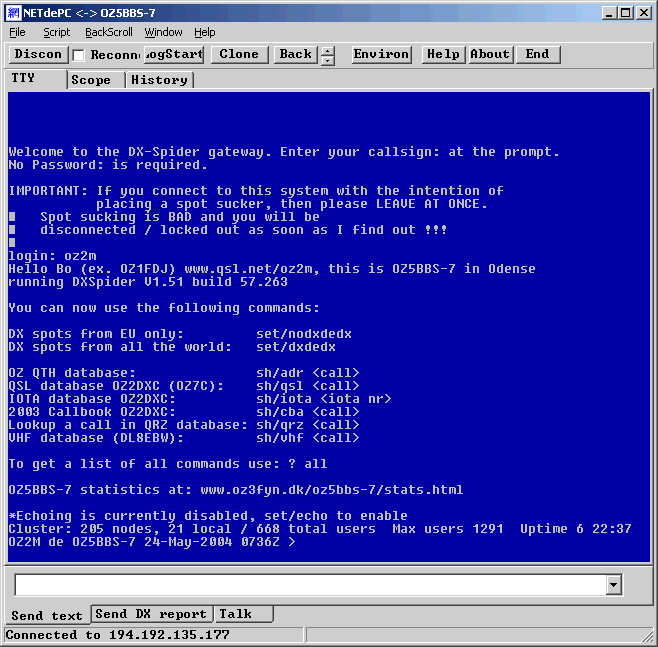
When you want to leave the DX cluster type b for Bye.
b
When disconnected you may close the window.
The DX cluster settings you only have to enter into the DX cluster system ones, unless your personal settings file is deleted on the system for some reason, e.g. system crash. Of cause you will have to change my data below to match to your personal data. Below is a list of all the settings you may want to do.
set/name Bo (ex. OZ1FDJ) www.rudius.net/oz2m
The set/name command is used to enter your name. But you may also enter more information like above.
set/qth Herlev, 10 km west of Copenhagen, Denmark, JO65FR24
The set/qth command is used to enter your place of living in "human terms."
set/location 55 44 N 12 26 E
The set/location command is used to enter your own latitude and longitude. If you cannot remember your own latitude and longitude but only your locator, see below, just skip this command.
set/qra JO65FR
The set/qra command is used to enter your own locator.
set/home OZ5BBS-7
The set/home command tells the DX cluster system which DX cluster node you normally use.
set/dxgrid
The set/dxgrid commands make the DX cluster display the spotting station's own locator if set by the spotting station. Too many have not done this! See an example of set/dxgrid enabled or not here.
unset/wx
The unset/wx disables the weather announcements spots from the DX cluster.
accept/spots on 50000/433000 and (by_zone 14,15,16,20,33,34,40 or call_zone 14,15,16,20,33,34,40)
This spot filter only permits spots from 50 MHz to 433 MHz and to or from CQ Zones 14, 15, 16, 20, 33, 34 and 40, i.e. "Greater Europe."
unset/ann
The unset/ann command disables announcements sent by a station to all other stations.
unset/wwv
The unset/wwv command disables the WWV timing spots send.
unset/wcy
The unset/wcy command disables WCY spots. I must admit I cannot even remember what WCY is anyway! So it is probably not that important.
Below is a list of the most used daily commands. Learn them and you will not have to learn other, and if you do you can find them in the User Manual.
sh/dx [NUMBER_OF_SPOTS] [CALL] [on BAND]
e.g. sh/dx 33 oz2m on 4m will show the last 33 spots where OZ2M was reported on 4 m. Please note that the DX cluster does not fully comply with the Metric notation principle when it comes to the unit. Metric notation says e.g. 23 cm but the DX cluster only accepts 23cm! By default NumberOfSpots is ten so if that is the number of spots you would like to see you may omit the NumberOfSpots sub command.
Note: If you include the band in the sub command do not forget the "on" before the band.
dx FREQ CALL [MESSAGE]
e.g. dx 70046 OZ2M Big signal. You can also add a decimal to the frequency, e.g. 70046.1 if you feel the need for it. Some DX clusters do not permit spotting the same station on the same frequency again. If you for some reason need to do this you can do it by adding a decimal number.
There are two ways you can talk to another station
Ad 1.
t CALL MESSAGE
The above will send the message to the Call station.
Ad 2.
t CALL
This command puts you in a mode where all you type, hereafter, will be send to the other Call station. To exit this mode you must type:
/ex
sh/st CALL
e.g. sh/st oz2m will show the station details for OZ2M.
sh/c [all]
e.g. sh/st will show who is connected to your local DX cluster and its neighbouring DX clusters.
Bo, OZ2M, www.rudius.net/oz2m